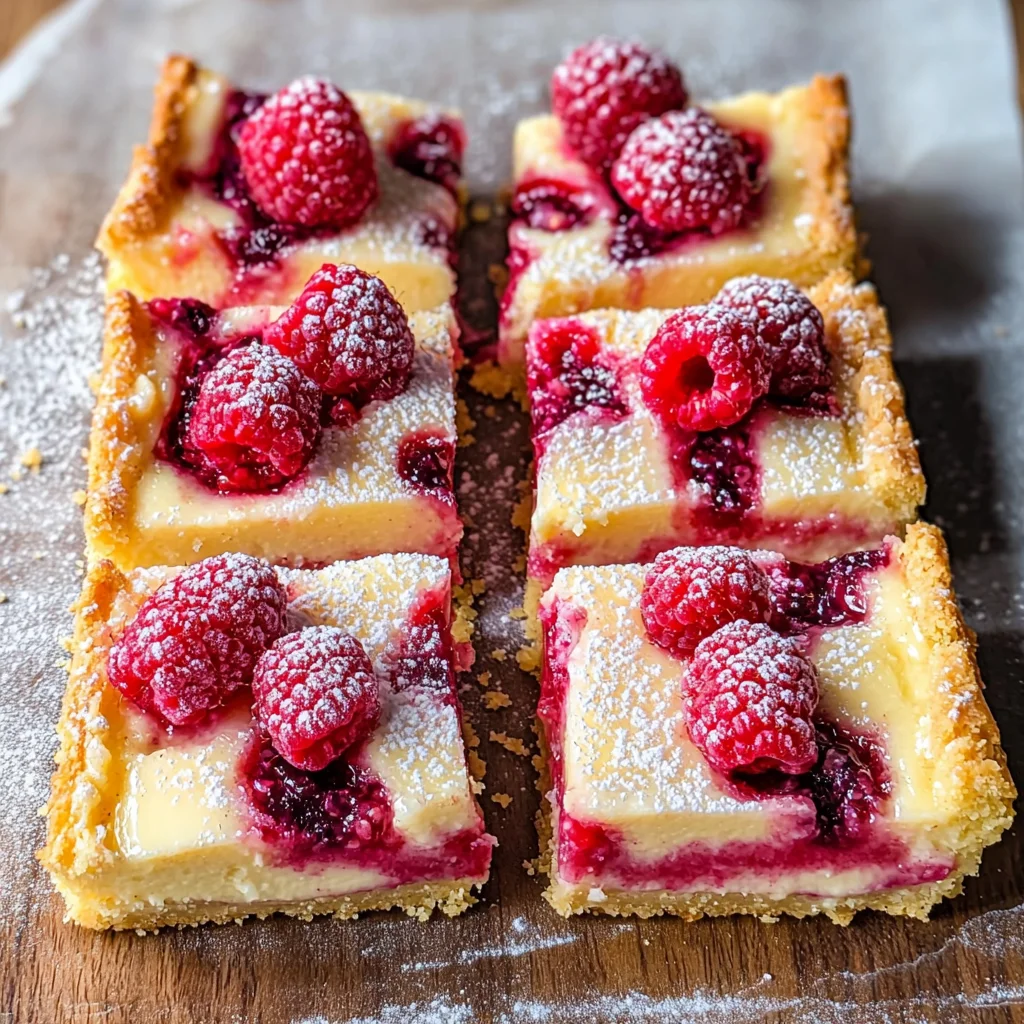
If you’re looking for a dessert that combines the bright, zesty flavors of lemon with the sweet tartness of raspberries, then you’re in for a treat! These Raspberry Lemon Cheesecake Bars are a delightful addition to any gathering, whether it’s a cozy family dinner or a summer picnic. They bring that nostalgic taste of pink lemonade right to your plate!
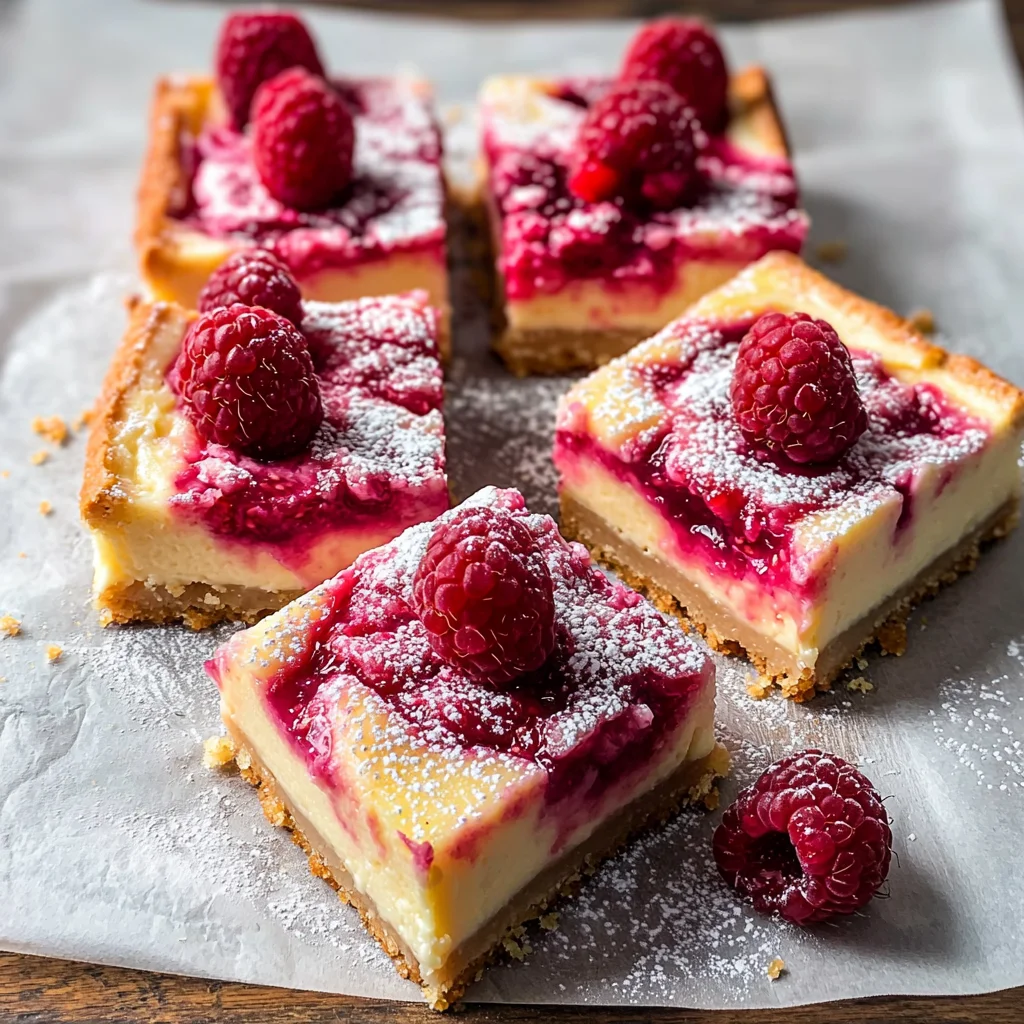
What makes these bars extra special is their creamy cheesecake filling layered atop a buttery shortbread crust, all topped off with fresh raspberry goodness. Trust me, once you try them, they’ll become a favorite in your kitchen too.
Why You’ll Love This Recipe
- Easy to Make: With straightforward steps and simple ingredients, you’ll whip up these bars without breaking a sweat.
- Perfect for Any Occasion: Whether it’s a birthday party or just a sweet treat after dinner, these bars fit right in.
- Make-Ahead Convenience: You can prepare them in advance and store them in the fridge, making them perfect for busy days.
- Deliciously Flavorful: The combination of creamy cheesecake and fruity raspberry will have everyone coming back for seconds!
- Family-Friendly: Kids and adults alike will adore this sweet but tangy delight!
Ingredients You’ll Need
These Raspberry Lemon Cheesecake Bars use simple, wholesome ingredients that you probably already have in your pantry. Here’s what you’ll need:
For the Crust
- 1/2 cup (112g) unsalted butter, room temp
- 1/2 cup (50g) powdered sugar
- 1 cup (132g) all-purpose flour
- 2 tbsp cornstarch
- Pinch of kosher salt
For the Cheesecake Filling
- 1/2 cup (108g) granulated sugar
- Zest of 1 lemon
- 1 8 oz block full-fat Philadelphia cream cheese, room temp
- 1 large egg
- 1/2 tsp vanilla extract
For the Raspberry Layer
- 1 pint fresh raspberries (or 2 cups frozen thawed)
- Juice of 2 lemons
- 3 large eggs
- 1 cup (210g) granulated sugar + 1 tsp (for the raspberries)
- 3 tbsp all-purpose flour
For Topping
- Powdered sugar, for dusting
Variations
This recipe is wonderfully flexible! Here are some fun ways to mix things up:
- Add Some Spice: Incorporate a pinch of cayenne pepper into the raspberry layer for a delightful kick.
- Go Vegan: Substitute the cream cheese with a vegan alternative and use flax eggs instead of chicken eggs.
- Change Up the Berries: Swap out raspberries for blueberries or strawberries depending on your preference or what’s in season!
- Make It Gluten-Free: Use gluten-free flour blends to create a delicious gluten-free version of these bars.
How to Make Raspberry Lemon Cheesecake Bars
Step 1: Prepare the Crust
Start by preheating your oven to 350°F (175°C). In a mixing bowl, combine the room-temperature butter and powdered sugar until it’s fluffy. Then add in the flour, cornstarch, and salt. This will create your buttery shortbread crust that’s both crumbly and delicious. Press this mixture evenly into the bottom of your prepared baking pan.
Step 2: Bake the Crust
Place the crust in your preheated oven and bake it for about 15 minutes or until lightly golden. This step is crucial because it sets the foundation for our creamy filling. Let it cool slightly while you prepare the cheesecake layer.
Step 3: Make the Cheesecake Filling
In another bowl, beat together granulated sugar, lemon zest, cream cheese, egg, and vanilla extract until smooth. Pour this luscious mixture over your cooled crust. The creaminess is what ties everything together beautifully!
Step 4: Prepare the Raspberry Layer
In yet another bowl, mash your raspberries gently with lemon juice and sugar. Then whisk in eggs and flour until combined. This layer adds not only flavor but also that stunning raspberry color that makes these bars so appealing.
Step 5: Assemble and Bake
Pour the raspberry mixture over the cheesecake layer carefully. Bake everything together for about 40-45 minutes until set but still slightly jiggly. Allowing it to cool completely is key; this helps achieve those perfect slices later on.
Step 6: Serve and Enjoy!
Once cooled, dust with powdered sugar before cutting into bars. These Raspberry Lemon Cheesecake Bars are now ready to be devoured! Enjoy them chilled for that refreshing summer vibe or at room temperature during any time of year—either way, they’re sure to be a hit!
Pro Tips for Making Raspberry Lemon Cheesecake Bars
Creating the perfect raspberry lemon cheesecake bars takes a bit of finesse, but with these tips, you’ll be well on your way to dessert perfection!
-
Use room temperature ingredients: Allowing your cream cheese and eggs to reach room temperature ensures a smoother batter and helps prevent lumps, resulting in a creamy texture.
-
Don’t overmix: When combining the cheesecake batter, mix just until the ingredients are incorporated. Overmixing can introduce too much air, leading to cracks during baking.
-
Chill before serving: For the best texture and flavor, refrigerate the cheesecake bars for at least two hours after baking. This allows the flavors to meld beautifully and makes cutting them easier.
-
Line your pan: Use parchment paper to line your baking dish, leaving some overhang. This will make lifting out the cheesecake bars a breeze when it’s time to cut them into squares.
-
Adjust sweetness to taste: Depending on the tartness of your raspberries and lemons, feel free to adjust the sugar in both the cheesecake filling and raspberry layer to achieve your desired level of sweetness.
How to Serve Raspberry Lemon Cheesecake Bars
These raspberry lemon cheesecake bars not only taste divine but also look stunning when presented well. Here are some creative ideas for serving!
Garnishes
- Fresh mint leaves: A few sprigs of mint add a pop of color and a refreshing aroma that complements the tangy lemon flavor.
- Zest of lemon: A sprinkle of fresh lemon zest on top enhances visual appeal while reinforcing that citrusy punch.
Side Dishes
- Fresh fruit salad: A medley of seasonal fruits adds brightness and balances the richness of the cheesecake bars with its natural sweetness.
- Whipped coconut cream: Light and fluffy coconut cream provides a dairy-free alternative that’s perfect for adding a creamy touch without overpowering the flavors.
- Lemon sorbet: This icy dessert is a delightful palate cleanser that pairs wonderfully with the warm, fruity notes of your raspberry lemon cheesecake bars.
- Chamomile tea: A fragrant cup of chamomile tea can provide a soothing complement to this sweet treat, making it an ideal finish to any meal.
Make Ahead and Storage
These raspberry lemon cheesecake bars are perfect for meal prep, making them an ideal treat to whip up ahead of time. They store well in the fridge or freezer, allowing you to enjoy a slice whenever the craving strikes!
Storing Leftovers
- Store leftover cheesecake bars in an airtight container.
- Keep them in the refrigerator for up to 5 days.
- For best results, layer parchment paper between bars to prevent sticking.
Freezing
- Wrap individual bars tightly in plastic wrap and then place them in a freezer-safe container.
- They can be frozen for up to 2 months.
- When ready to enjoy, thaw in the refrigerator overnight before serving.
Reheating
- For a warm treat, preheat your oven to 350°F (175°C).
- Place the bars on a baking sheet and heat for about 10-15 minutes until warmed through.
- Alternatively, you can microwave each bar for about 15-20 seconds for a quick reheat.
FAQs
Here are some common questions about Raspberry Lemon Cheesecake Bars that might help you along the way!
Can I use frozen raspberries for Raspberry Lemon Cheesecake Bars?
Yes! You can absolutely use frozen raspberries, just be sure to thaw and drain them before adding them into your cheesecake mixture.
How long do Raspberry Lemon Cheesecake Bars last?
When stored properly in the refrigerator, these delicious bars will last up to 5 days. If you’d like to keep them longer, consider freezing for up to 2 months.
Can I substitute the cream cheese in Raspberry Lemon Cheesecake Bars?
Yes! For a dairy-free option, try using vegan cream cheese. It offers a similar texture without compromising on flavor.
Final Thoughts
I hope you enjoy making these delightful raspberry lemon cheesecake bars as much as I do! They’re not only a visual treat with their vibrant colors but also an explosion of refreshing flavors that brighten any occasion. Don’t hesitate to get creative with this recipe, and enjoy every bite of your homemade dessert!
Raspberry Lemon Cheesecake Bars
Indulge in the delightful flavors of Raspberry Lemon Cheesecake Bars! These bars feature a creamy cheesecake filling layered atop a buttery shortbread crust, finished with a vibrant raspberry topping. Perfect for any gathering, these treats bring a refreshing burst of zesty lemon and sweet-tart raspberries to your dessert table. Easy to make and even easier to love, they are guaranteed to become a staple in your kitchen. Whether you’re serving them at a family dinner or enjoying them as an afternoon snack, each bite will transport you to sunny days and joyful moments.
- Prep Time: 20 minutes
- Cook Time: 55 minutes
- Total Time: 1 hour 15 minutes
- Yield: Serves approximately 12 bars 1x
- Category: Dessert
- Method: Baking
- Cuisine: American
Ingredients
- 1/2 cup (112g) unsalted butter, room temp
- 1/2 cup (50g) powdered sugar
- 1 cup (132g) all-purpose flour
- 2 tbsp cornstarch
- Pinch of kosher salt
- 1/2 cup (108g) granulated sugar
- Zest of 1 lemon
- 1 8 oz block full-fat cream cheese, room temp
- 3 large eggs
- 1/2 tsp vanilla extract
- 1 pint fresh raspberries (or 2 cups frozen thawed)
- Juice of 2 lemons
- 1 cup (210g) granulated sugar + 1 tsp (for the raspberries)
- 3 tbsp all-purpose flour
- Powdered sugar, for dusting
Instructions
- Preheat your oven to 350°F (175°C). In a bowl, mix room-temperature butter and powdered sugar until fluffy. Add flour, cornstarch, and salt; mix until combined. Press mixture into the bottom of a baking pan.
- Bake the crust for 15 minutes until lightly golden. Allow it to cool slightly.
- In another bowl, beat together granulated sugar, lemon zest, cream cheese, egg, and vanilla until smooth. Pour over the cooled crust.
- Mash raspberries with lemon juice and sugar in a separate bowl. Whisk in eggs and flour until combined, then pour over the cheesecake layer.
- Bake for 40-45 minutes until set but slightly jiggly in the center. Cool completely before slicing.
- Dust with powdered sugar before serving.
Nutrition
- Serving Size: 1 serving
- Calories: 200
- Sugar: 16g
- Sodium: 100mg
- Fat: 10g
- Saturated Fat: 5g
- Unsaturated Fat: 3g
- Trans Fat: 0g
- Carbohydrates: 25g
- Fiber: 1g
- Protein: 3g
- Cholesterol: 40mg