If you’re looking for a delicious way to capture the essence of fall, then this Apple Pie Jam {for canning} is just what you need! There’s something so comforting about the warm, spicy aroma of apples cooking down with cinnamon and nutmeg. This recipe has become a family favorite for us, perfect for sharing at gatherings or simply enjoying on a cozy morning toast. The best part? It’s super simple to make and safe for water bath canning, so you can savor that autumn goodness all year round!
Imagine spreading this sweet, spiced jam on freshly baked bread or even spooning it over yogurt for breakfast. It’s truly versatile and brings a smile to everyone’s face when they taste it!
Why You’ll Love This Recipe
- Quick and Easy: With just a few simple steps, you’ll have delightful jam ready in no time!
- Family-Friendly: Everyone loves the classic flavors of apple pie, making this jam a hit across all ages.
- Perfect for Gifting: Jars of this homemade jam make thoughtful gifts during the holiday season or any special occasion.
- Versatile Use: Enjoy it on toast, pancakes, or even as a filling in your favorite pastries.
- Canning Made Simple: This recipe allows you to safely preserve that delicious apple flavor for future enjoyment.
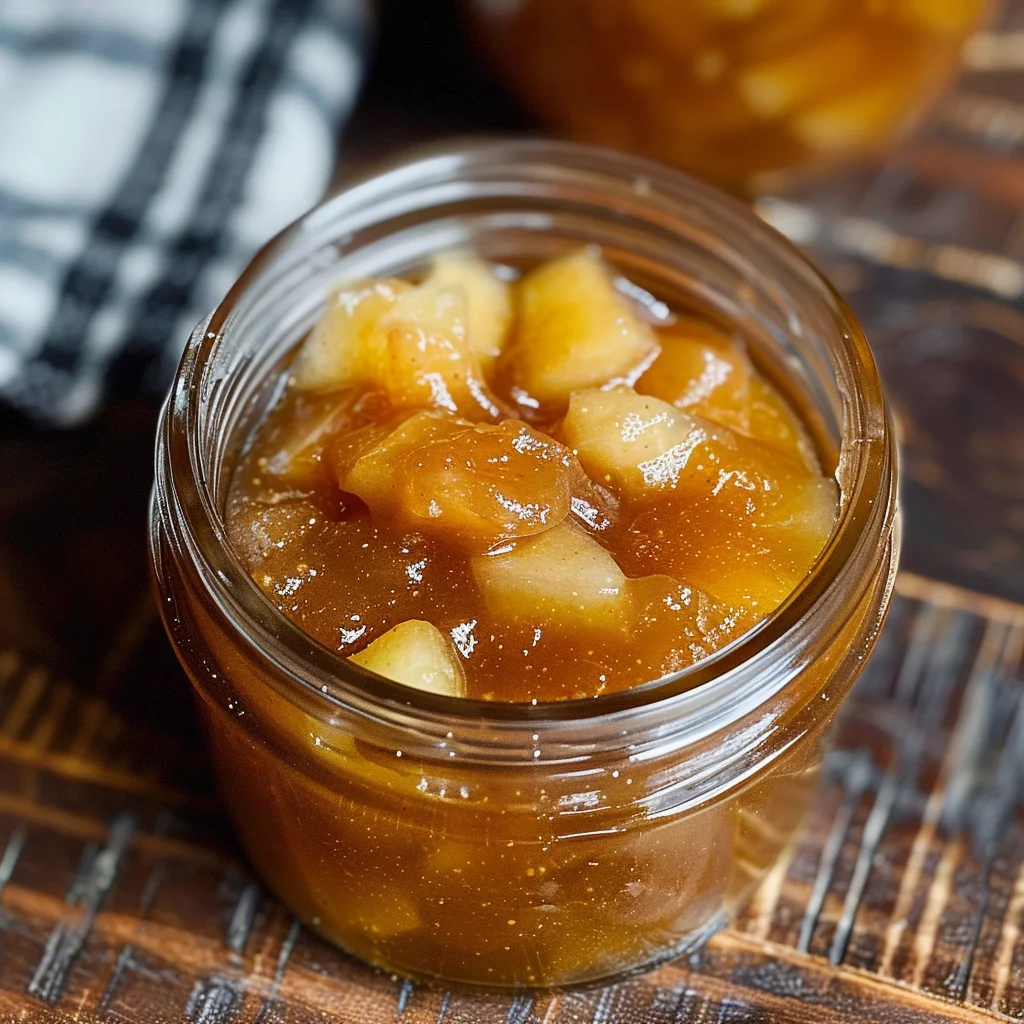
Ingredients You’ll Need
Creating this Apple Pie Jam is all about using simple, wholesome ingredients that come together beautifully. Here’s what you’ll need to gather:
For the Jam
- 8 cups peeled and diced apples (about 6 apples) (I recommend using Granny Smith green apples)
- 2 cups apple juice (I recommend using organic)
- 1 small lemon, zest and juice
- 1 tbsp apple cider vinegar
- pinch of salt
- 3 tbsp pectin
- 1.5 tsp ground cinnamon
- 1/2 tsp ground ginger
- 1/2 tsp ground cardamom
- 1/4 tsp ground cloves
- 1/4 tsp ground nutmeg
- 3 cups white granulated sugar
Variations
This recipe is wonderfully flexible, allowing you to customize it based on what you have or your personal taste preferences.
- Add Some Heat: Mix in a pinch of cayenne pepper for a spicy kick that contrasts beautifully with the sweetness.
- Change Up the Fruit: Combine apples with pears or peaches for a unique twist on traditional apple pie flavor.
- Try Different Spices: If you love experimenting, swap out some spices like adding allspice or nutmeg to create your own signature blend.
- Make It Low-Sugar: Use a sugar substitute like monk fruit sweetener to reduce the sweetness while still enjoying that lovely flavor.
How to Make Apple Pie Jam {for canning}
Step 1: Prepare the Apples
Start by combining those lovely diced apples with apple juice, lemon zest, lemon juice, apple cider vinegar, and a pinch of salt in a large pot. Bringing these ingredients to a boil helps soften the apples and allows their natural sweetness to emerge.
Step 2: Simmer Until Tender
Once boiling, turn down the heat and let everything simmer for about 10-12 minutes until those apples are nice and tender. This step is crucial as it creates the perfect base for your jam.
Step 3: Add Spices and Pectin
Now it’s time to add in all those delightful spices! Sprinkle the pectin over the top while stirring it in gradually. This ensures even distribution throughout your mixture. When you bring this back up to a full rolling boil, you’re getting closer to that beautiful jam consistency!
Step 4: Sweeten It Up
Once boiling again, add in all your sugar at once. Bring it back up to another full rolling boil—this is where magic happens! Set your timer for one minute while continuing to stir. This process prevents scorching and helps achieve that luscious texture.
Step 5: Jar It Up!
Remove the pot from heat when done. You can either spoon this fragrant jam into jars if you plan to refrigerate it or follow proper canning procedures if you’d like to store them longer. Either way, you’re left with delicious homemade Apple Pie Jam ready for enjoyment!
Pro Tips for Making Apple Pie Jam {for canning}
Making Apple Pie Jam can be a delightful experience, and these tips will help ensure your jam turns out perfectly every time!
-
Choose the right apples: Selecting tart varieties like Granny Smith not only enhances the flavor but also balances the sweetness of the sugar, resulting in a more complex and satisfying jam.
-
Prep your jars ahead of time: Sterilizing your jars before filling them ensures that your jam stays fresh longer and prevents spoilage. A quick boil in hot water does the trick!
-
Use fresh spices: Freshly ground spices offer a more robust flavor compared to pre-ground ones. This makes a noticeable difference in taste, giving your jam that authentic apple pie essence.
-
Don’t rush the boiling process: Allowing the mixture to reach a full rolling boil before adding sugar is crucial for achieving the right texture. It helps activate the pectin properly, ensuring your jam thickens beautifully.
-
Test for doneness: Before removing from heat, do a gel test by placing a small spoonful of jam on a cold plate. If it holds its shape after cooling, your jam is ready to be jarred!
How to Serve Apple Pie Jam {for canning}
This luscious Apple Pie Jam is versatile and can be enjoyed in various ways! Here are some delightful serving ideas that will elevate your experience.
Garnishes
- Whipped Coconut Cream: A dollop of whipped coconut cream adds a creamy texture that complements the jam’s sweetness beautifully.
- Chopped Nuts: Sprinkle some chopped pecans or walnuts on top for an added crunch and nutty flavor that contrasts nicely with the smoothness of the jam.
Side Dishes
- Toast: Spread this delicious jam over warm, toasted bread or English muffins for a simple yet satisfying breakfast or snack.
- Cheese Platter: Pair it with cream cheese or goat cheese on crackers. The creamy cheese balances the sweetness of the jam, creating an indulgent treat.
- Oatmeal: Stir this Apple Pie Jam into oatmeal for breakfast. It infuses your morning bowl with warm spices and sweetness, making it feel like dessert!
- Pancakes or Waffles: Use it as a topping for pancakes or waffles instead of syrup. The fruity flavors make brunch feel extra special!
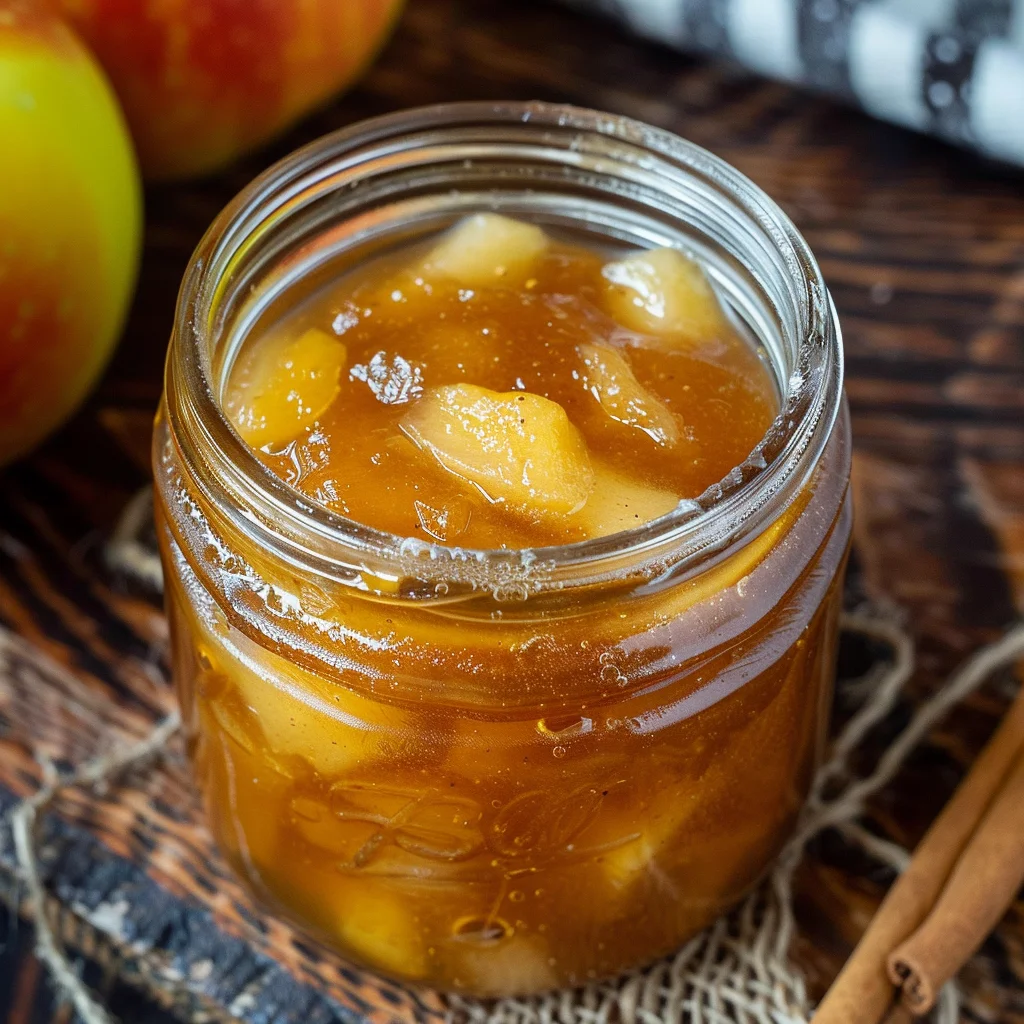
Make Ahead and Storage
This Apple Pie Jam {for canning} is a fantastic option for meal prep, allowing you to enjoy the flavors of fall all year round. Here’s how to store and preserve it:
Storing Leftovers
- Store opened jars of jam in the refrigerator for up to 3 weeks.
- Make sure to use a clean spoon each time you scoop out some jam to prevent contamination.
Freezing
- If you want to keep your jam longer, freeze it in airtight containers or freezer-safe jars.
- Leave about an inch of headspace at the top to allow for expansion when freezing.
Reheating
- If your jam has thickened too much after refrigeration, gently warm it on the stove over low heat while stirring until it reaches your desired consistency.
- You can also microwave small amounts in short intervals, stirring in between.
FAQs
Can I use different types of apples for Apple Pie Jam {for canning}?
Yes! While Granny Smith apples are recommended for their tartness, you could also mix in sweeter varieties like Fuji or Honeycrisp for a different flavor profile.
How long does Apple Pie Jam {for canning} last when stored properly?
When canned and sealed correctly, Apple Pie Jam can last up to one year on the shelf. Once opened, it should be refrigerated and consumed within 3 weeks.
Can I make this recipe without pectin?
While pectin helps with the jam’s consistency, you can make it without if you prefer a looser texture. Just keep in mind that it may take longer to reach the desired thickness.
Final Thoughts
I hope this Apple Pie Jam {for canning} brings warmth and joy into your kitchen! It’s a delightful way to capture the essence of autumn and share it with loved ones. Enjoy making this flavorful treat, and don’t hesitate to experiment with your own variations. Happy canning!
Apple Pie Jam for Canning
Experience the comforting flavors of fall with this delightful Apple Pie Jam for canning. This easy recipe captures the essence of autumn, combining tart Granny Smith apples with aromatic spices like cinnamon and nutmeg. Perfect for breakfast spreads, topping pancakes, or as a thoughtful gift, this jam is versatile and simple to make. Plus, it’s safe for water bath canning, allowing you to savor its sweet warmth all year round. Enjoy the process of creating this nostalgic treat that brings joy to your table!
- Prep Time: 15 minutes
- Cook Time: 30 minutes
- Total Time: 45 minutes
- Yield: Approximately 12 servings 1x
- Category: Dessert
- Method: Canning
- Cuisine: American
Ingredients
- 8 cups peeled and diced apples (about 6 Granny Smith apples)
- 2 cups organic apple juice
- 1 small lemon (zest and juice)
- 1 tbsp apple cider vinegar
- Pinch of salt
- 3 tbsp pectin
- 3 cups white granulated sugar
- 1.5 tsp ground cinnamon
- 0.5 tsp ground ginger
- 0.5 tsp ground cardamom
- 0.25 tsp ground cloves
- 0.25 tsp ground nutmeg
Instructions
- In a large pot, combine diced apples, apple juice, lemon zest and juice, apple cider vinegar, and a pinch of salt. Boil until the apples are tender (10-12 minutes).
- Stir in spices and pectin gradually while bringing the mixture back to a full rolling boil.
- Add sugar all at once; return to a boil for one minute while stirring continuously.
- Remove from heat; jar immediately following proper canning procedures or refrigerate if consuming soon.
Nutrition
- Serving Size: 15g
- Calories: 50
- Sugar: 13g
- Sodium: 0mg
- Fat: 0g
- Saturated Fat: 0g
- Unsaturated Fat: 0g
- Trans Fat: 0g
- Carbohydrates: 14g
- Fiber: 0g
- Protein: 0g
- Cholesterol: 0mg